

Day 1: Getting started
Taking time for an introduction to our new "gym" area

This blog section will be a collection of posts as I work on programming with my son—somewhat like a real-time look into what is involved in training a youth athlete and how it is going. For those interested in the details, subscribe to the premium newsletter for program specifics and extra insight into the process.
We began the program a couple of weeks before I started this blog, so the first posts will be after the fact and not accurately represented in time compared to when the workout occurred. We generally focus on strength training three days a week, so three posts represent about a week.
Day 1: Walkthrough
Getting started sometimes feels like the most challenging thing, but we did it. This was our first time finally getting the garage gym cleaned out and the workout area prepped, so I walked through the equipment and demonstrated some exercises we would cover over the early part of his program. We went over barbells, using a bench with the half rack, kettle bells, TRX (suspension cords), plyo box, and chin ups.
Our primary focus to start will be working on form using bodyweight exercises. This was a chance to get acquiainted and excited about what is to come.
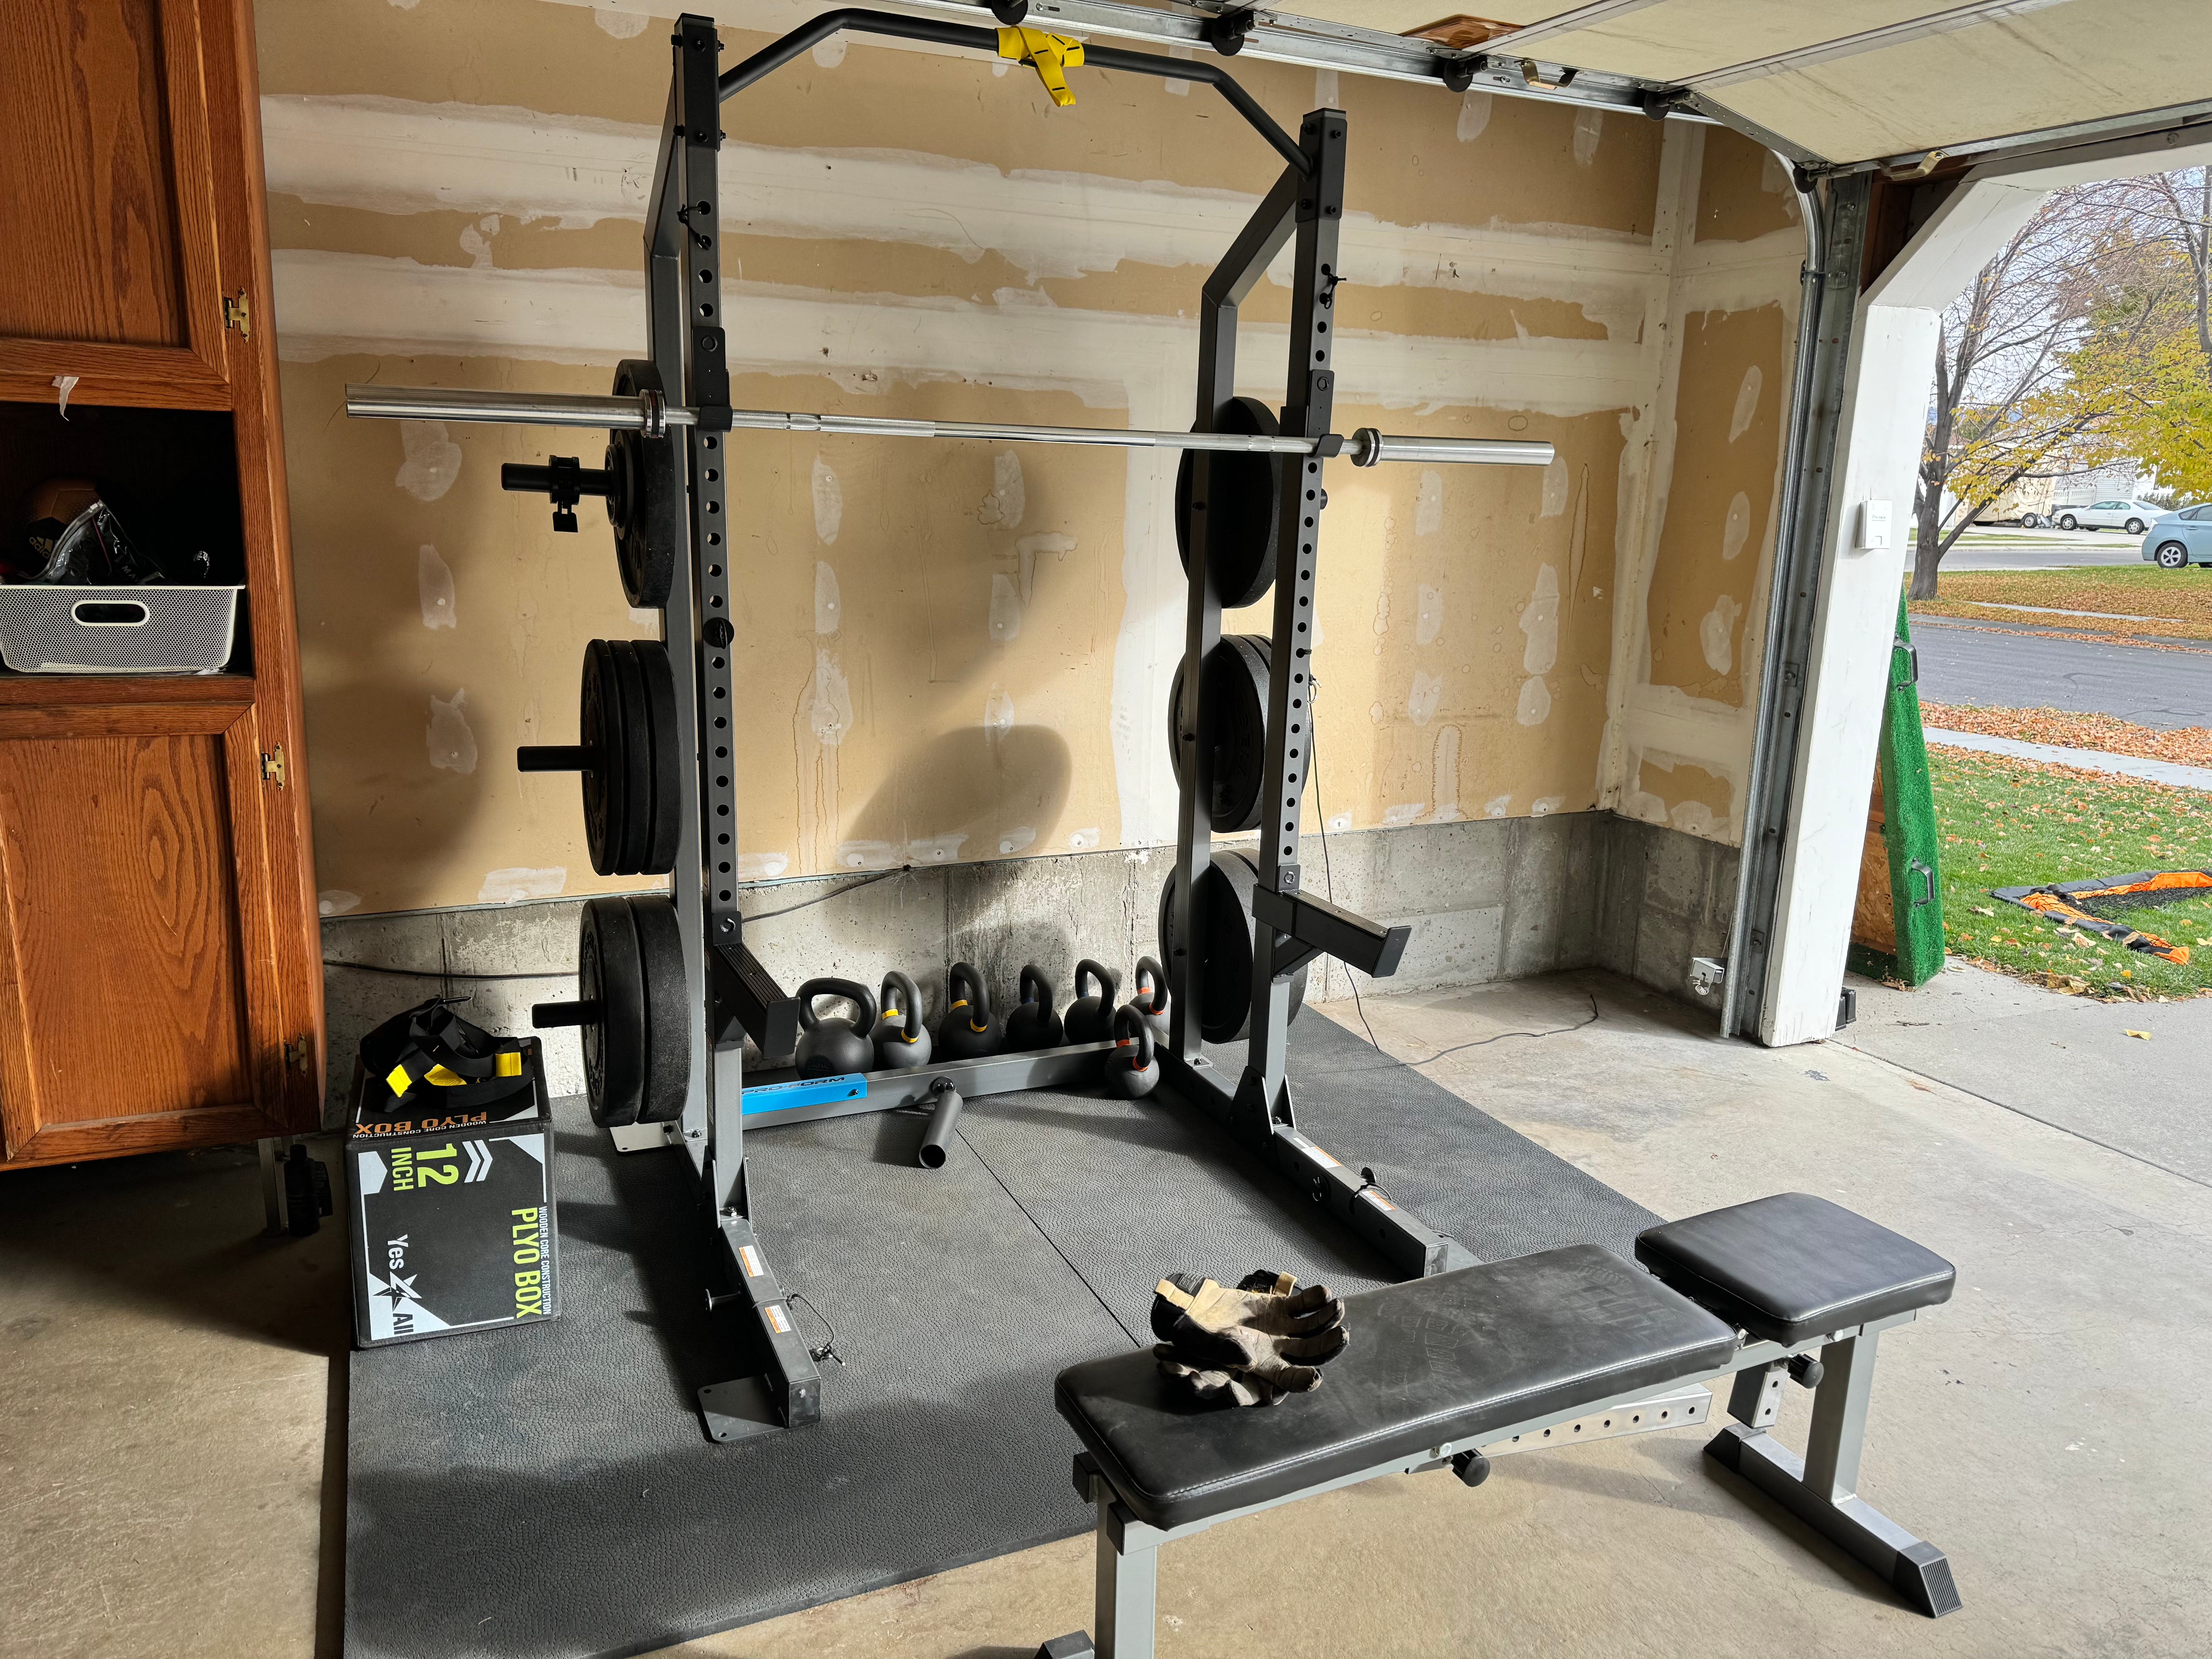
Equipment
As there was no specific workout planned for the day, I introduced some of the different tools that we have available. The home station is a half rack I picked up this spring when I found it on clearance at Dick’s (the rack itself was $0.02 cheaper than the cost of shipping!) The frame is seated on two horse stall mats from Home Depot.
It took a while to accumulate all of these items over the past several years, but it came together once we committed the garage space for our home gym. It finally felt ready to go when I found a set of Olympic barbell plates for sale on KSL Classifieds for a decent price. If you are not in a rush, start your home gym now, even if it begins with a few sets of dumbbells like us.

Here is a callout to one of the tools we used: a wood plyo box with a padded cover. (Purchase a Yes4All plyo box, #ad)
We went with the smallest one (16” x 14” x 12”) as it was the least expensive but also great for beginners. I will go into more detail about specific equipment in the future. However, if you choose to get a plyo box, avoid the all-foam ones because they are too light and tend to slide around to the point where they feel dangerous—get one made out of wood.
The box is excellent, and I am saving up to afford one that is my size (30” x 24” x 20”).